


ImageOptim, SpaceSaver, Squash, or TinyJPG | Image Compressor Test
I must admit, I have been looking back on a few blog posts that I’ve published and I’ve noticed that some photographs could definitely be a bit sharper. And as a photographer, the visual quality that we put out into the world could mean extra bookings on the calendar… or website traffic “bouncing” away. So, you can bet your bottom dollar that I wanted to ensure that I was doing the right thing by using the best image compressor.
And that led me to perform an image compression test to try and figure out what the best image compressor is on the market.
I was willing to pay whatever it took, too. Thankfully on that note, most image compressors are relatively inexpensive ($0-40) with most falling somewhere around $29.
And without telling you all the things I’ve been doing wrong in the past (who needs to waste their time reading that bunch of fluff, am I right?)… I am going to get straight to what I’ve found that works the best. But of course, this is all a total personal preference, so take what you learn here with a grain of salt. Don’t get caught up with shiny object syndrome. Just use what works for you and your image quality and compression goals. Period.
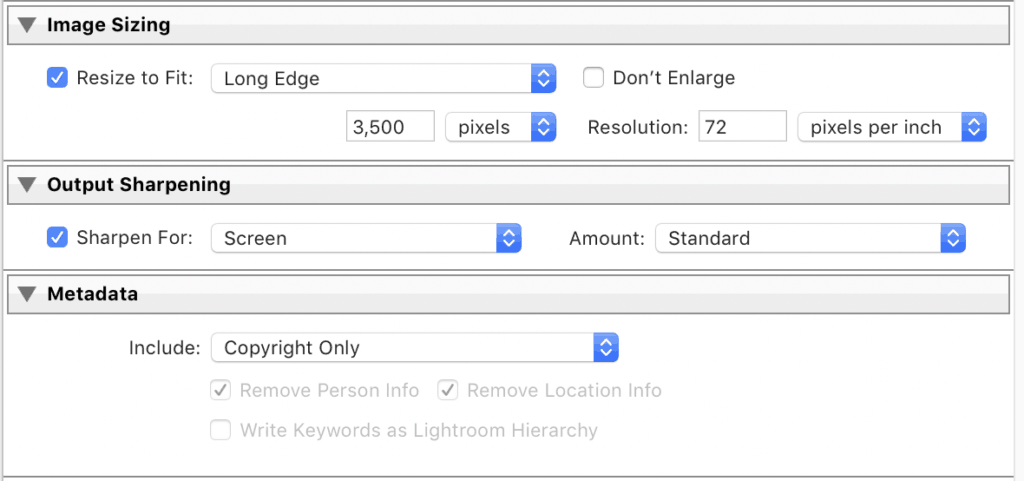
STEP 1: Export the images that you want to use on your blog from Lightroom in high-resolution at their native resolution… or whatever best suits your needs.
Vague right? Well, I say that because 3500px on the long edge would fit most everything you could need. Additionally, that’s what ShowIt recommends we do when we upload images to their platform… so why not kill two birds with one stone, right? I’m all about efficiencies at every possible angle.
Personally, I don’t control the export settings too much. This is what I personally do…
STEP 2: Determine what your blog width displays at (a very specific pixel count).
You can find this with a free page ruler Chrome extension and with that extension, simply measure your blog width in pixels. Easy peasy.
Personally, my wedding photography blog measures out to be 845px wide.
What does your blog measure out to be? Do that first before carrying on throughout this blog post.
STEP 3: Use Blogstomp.
Upload your curated photographs to Blogstomp in high resolution.
In Settings > Styles, set your width for each “stomp”. (A “stomp” is a series of your chosen images in a collage using the software).
That width should be 2X the width of your blog display area, as you found above in Step 2.
At this point, you’re ready to “STOMP!” your images using Blogstomp into beautiful collages. Don’t overthink the exact collage styles for each stomp. Just trust your gut and tell your story using the images.
Step 4: In your “Stomped” folder with all those gorgeous collages, you’re ready to compress them using an image compressor!
Now here’s where it can get confusing as well since there are so many options out there. And I didn’t even test them all out. Why? Because there’s no point. I tested out four of the current best image compressor software applications – Squash, SpaceSaver, TinyJPG, and ImageOptim. And here’s the shocking revelation that I found…
They are all basically the same for the things you need to do.
Except for TinyJPG.
Squash, SpaceSaver, and ImageOptim all reduced the image file size by about 8-14%. Not great. Not much difference.
But with TinyPNG, I saw huge reductions – averaging around 50% in file size. And when trying to learn how to speed up your website by improving image compression… that’s a huge goal.
The only thing I wasn’t excited about is the additional step it makes you do. It makes you download the images (after compressing them in TinyJPG) into a ZIP file, then you have to open that ZIP file and get them into your desired destination folder. Not great. Efficiencies with these extra small steps take a hit.
But is that worth it to you for the extra compression and improve page load time? Perhaps.
It’s up to you to decide.
These were my results from just a few test images using TinyJPG:
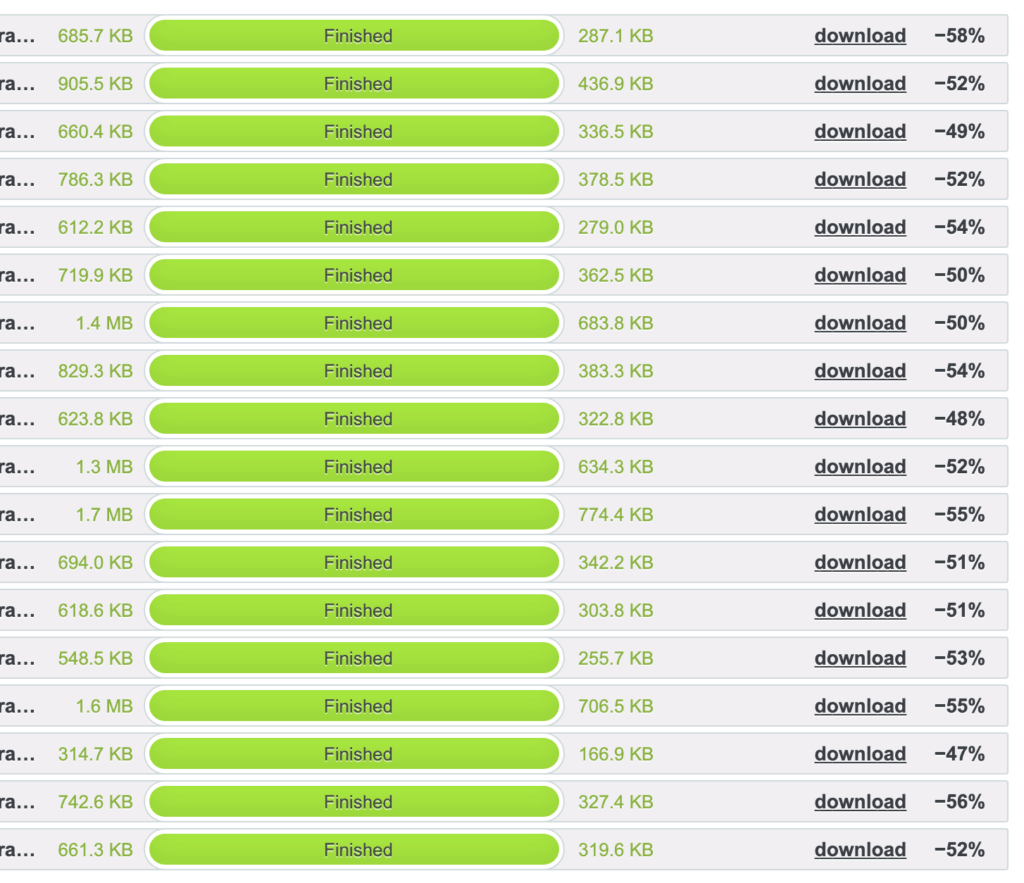
So, if you are looking for the best image compressor out there… I would recommend you check out TinyJPG.
That’s not an affiliate link. Because it’s free.
I just wanted to write this up to help you.
Happy compressing.
…. Now what do you do after you compress your images and get them onto your blog?
It’s time for more compression. For that, I use the ShortPixel WordPress Plugin. Get it. Use it.
Get Help & Join The Mastermind
s
Photography
And/or
Education

I help photographers (of all types) as well as educators (course creators, consultants & coaches) make more money, work fewer hours per week, and improve their work-life balance. All without ads.
If that sounds like something you're wanting for yourself and your business, check out how I can help. What I offer is a blend between coursework, coaching, and done-for-you services. I have all the options you could need. And, of course, if you ever want to see which is the right path for you or if you have any questions - just reach out to me using my Contact form on my website or simply schedule a free call with me.
I really am here to help.
Photography mastermind »
Education Mastermind »
Listen & Subscribe!
Check Out My Podcast Below
How i Can Personally Help you
Choose Your Path


Apply for a Free Discovery Call
Get on a *free* 1:1 Zoom call with me to help identify a path that is unique to you. It will also give us a chance to chat about what it's like working together on that unique path. Schedule your call now!


Showit Websites
Showit website templates, and custom website optimization sessions that are designed for both conversion and SEO.


Signature Lightroom Preset Pack
Quite possibly the last pack you'll ever need. These took me more than 12 years to refine.

Photography Business Mastermind
SEO, sales, website conversion, systems, automation, client communication, time management, and way more. Get my personal help directing you... step-by-step with full clarity, accountability, and with strategy that helps get you more bookings, more profit, and more time back with your family.


